Querying Neuronal Connections with the neuPrint API
# 1. load your packages at the top
import pandas as pd
import plotly.express as px
from neuprint import Client
c = Client('neuprint.janelia.org', dataset='male-cns:v1.0', token='enter token')
For this tutorial, we will start by exploring a region of the fly brain called the mushroom body (MB). Before we start exploring it with neuPrint, let’s find out what makes this part of the brain so interesting.
Why is it called the mushroom body?
Take a look at the image below. Can you see why scientists gave this structure its name?
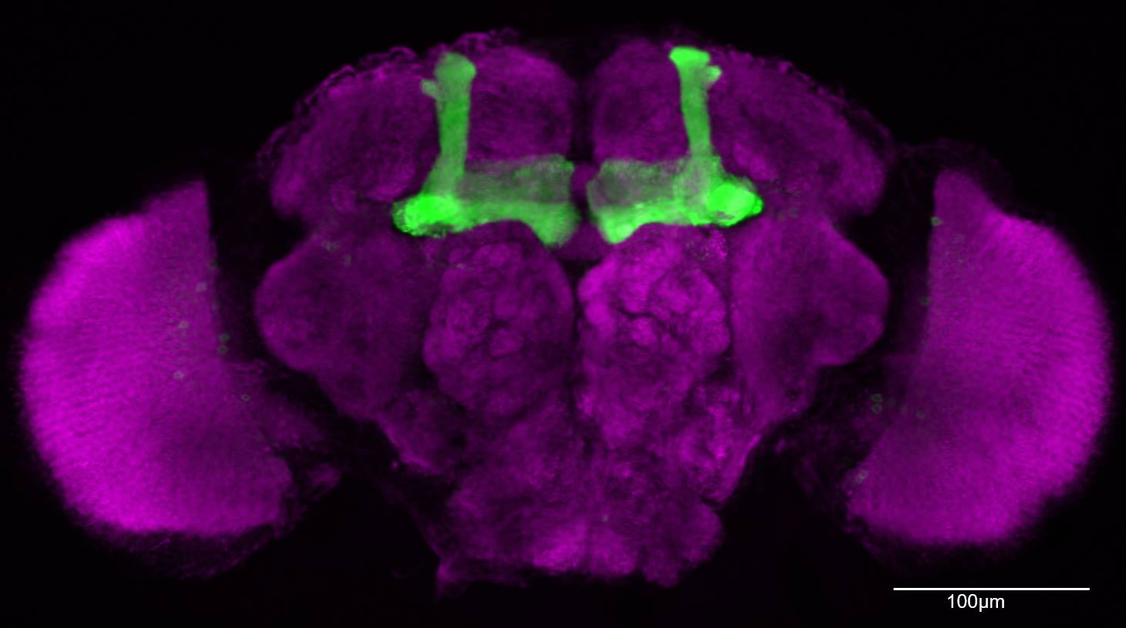
The Drosophila mushroom body. When viewed under a microscope, the mushroom body has a shape that looks surprisingly similar to a mushroom! Scientists can make the structure easier to see using GFP (green fluorescent protein), which makes the neurons glow green. Figure courtesy of Katrin Vogt.
The mushroom body is found in the brains of many invertebrates, including insects, spiders, and scorpions. In the fruit fly Drosophila melanogaster, the mushroom body contains roughly 2,500 neurons, most of which are small neurons called Kenyon cells.
What does the mushroom body look like?
Let’s zoom in.
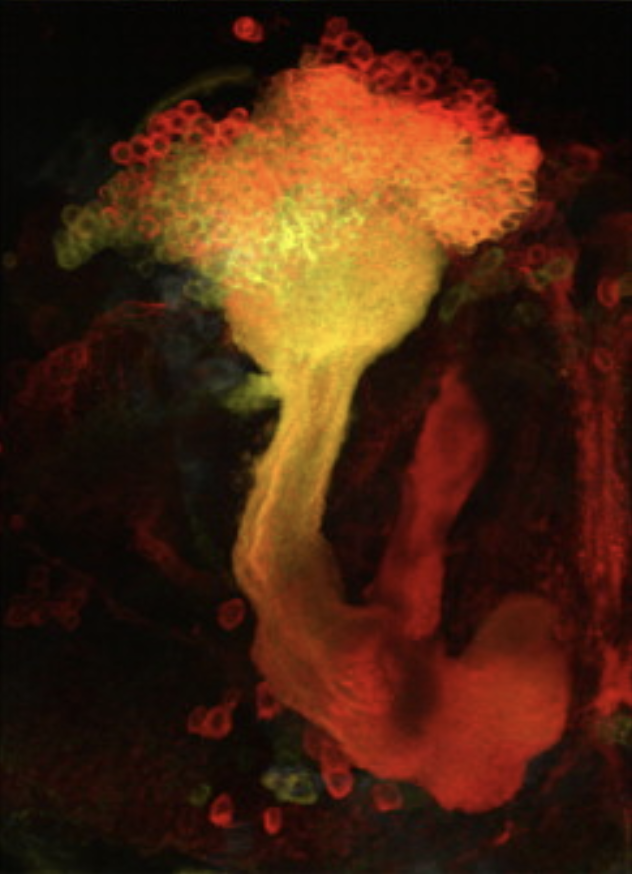
Close-up of the Drosophila mushroom body. Figure courtesy of Campbell and Turner, 2010.
There are a few important parts to notice:
Calyx — where Kenyon cells receive information from other neurons.
Stalk — where the axons of Kenyon cells bundle together.
Lobes — where Kenyon cells send information to other parts of the brain.
You can think of the mushroom body as a place where information comes in, gets processed, and is then sent out to other parts of the brain.
And this is where neuPrint becomes really useful.
Instead of only looking at a picture of the mushroom body, we can use the fly’s connectome to ask: Who is connected to whom?
So, what does the mushroom body actually do?
The mushroom body is involved in learning and memory.
For example, researchers can train a fly to associate a particular smell with something unpleasant, such as an electric shock. After learning this association, the fly can change its behavior when it encounters that smell again.
Scientists have found that the mushroom body is essential for this type of learning. When researchers block the output of the mushroom body, flies have difficulty performing these learned behaviors.
This raises an interesting question:
How can a network of neurons help a fly learn?
We can start investigating this question using the connectome.
Uncovering How a Brain Learns
Imagine that a fly encounters a smell. Information about that smell travels through the brain and eventually reaches the mushroom body.
A simplified version of this pathway looks something like:
Smell → sensory neurons → mushroom body → downstream neurons → behavior
As you can see, the mushroom body does not work alone. It receives information from other parts of the brain and sends information to neurons downstream. This gives us several questions that we can investigate using neuPrint.
Let’s Start Simple
We know that the mushroom body contains 2,500 neurons of which most of Kenyon cells. Do all of these Kenyon cells do the same thing? Or, are different Kenyon cells connected to different neurons? Using neuPrint, we can explore the connections of individual Kenyon cells and investigate where their information comes from and where it goes.
Challenge: Meet a Kenyon Cell
Let’s explore a Kenyon cell and its connections!
As you explore, consider the following questions:
Which cell types send information to the Kenyon cell of interest?
Which cell types receive information from the Kenyon cell of interest?
Are some partners cell types more strongly connected to the Kenyon cell of interest than others?
Do different Kenyon cell types connect to similar cell types, or do they have distinct connectivity patterns?
Do different Kenyon cell types receive and send information with similar strengths?
Think like a scientist: Don’t worry about finding the “right” answer immediately. Start by exploring the connections and see what patterns you can find. Your observations may lead to new questions!
To begin exploring connectivity in the mushroom body (MB), we first need a way to retrieve connections between neurons and determine their connection strength, inferred from the connectome by the number of synapses.
Fetching connections
The fetch_adjacencies function allows us to retrieve connections between neurons, including the number of synapses connecting them.
We will also use Neuron Criteria (NC) to fine-tune our queries. This allows us to specify exactly which neurons or brain regions we are interested in. In this case, we want to focus on the mushroom body (MB), and more specifically, Kenyon cells (KCs).
Throughout this tutorial, you will notice that we regularly refer to the neuPrint documentation and highlight relevant sections that we explain in more detail. For this particular section, please refer to the neuPrint Python documentation, which provides a useful guide to querying and fetching connections between neurons.
Let’s import the functions we will need:
Copy and paste the following in you notebook
# In a typical Python script / notebook, imports are usually placed at the top.
# We are importing these functions here so you can see where they come from as we introduce them.
from neuprint import fetch_adjacencies, NeuronCriteria as NC
Before constructing our query, we need to determine how Kenyon cells are labeled in the dataset. A useful resource for exploring cell types in the male Drosophila CNS is the Cell Type Explorer.
Click “Browse all types”. We can then use the Region filter to explore cell types associated with the mushroom body (MB). Next, search for Kenyon Cells under Class in the Cell Type Explorer. You will see that Kenyon cell types have names beginning with KC.
Note: If you are exploring a different cell type or brain region, you can simply type its name into the search bar. This example is mainly intended to show you how cell type names and abbreviations are specified in connectome nomenclature.
Creating our Neuron Criteria
To search for specific neurons in neuPrint, we can use Neuron Criteria. The neuPrint documentation describes this as a way to specify neurons of interest by bodyId, type, instance, or a NeuronCriteria object.
Before using these criteria, it is helpful to understand what these terms mean. The NeuPrint Data Model Terms section of the neuPrint User Guide provides definitions for these concepts.
bodyId
A bodyId is the unique identifier assigned to an individual neuron in the connectome. For example, if we wanted to query one specific neuron, we could use its bodyId.
type
A type is the name assigned by biologists to describe a cell type. For example, Kenyon cell types have names beginning with KC.
instance
An instance provides additional information about an individual neuron, including the hemisphere in which its cell body is located.
When this information is known, _L and _R are appended to the cell type name to indicate the left and right sides of the brain, respectively.
For example:
KCa'b'-ap1→ the cell typeKCa'b'-ap1_L→ an instance of this cell type on the left side of the brainKCa'b'-ap1_R→ an instance of this cell type on the right side of the brain
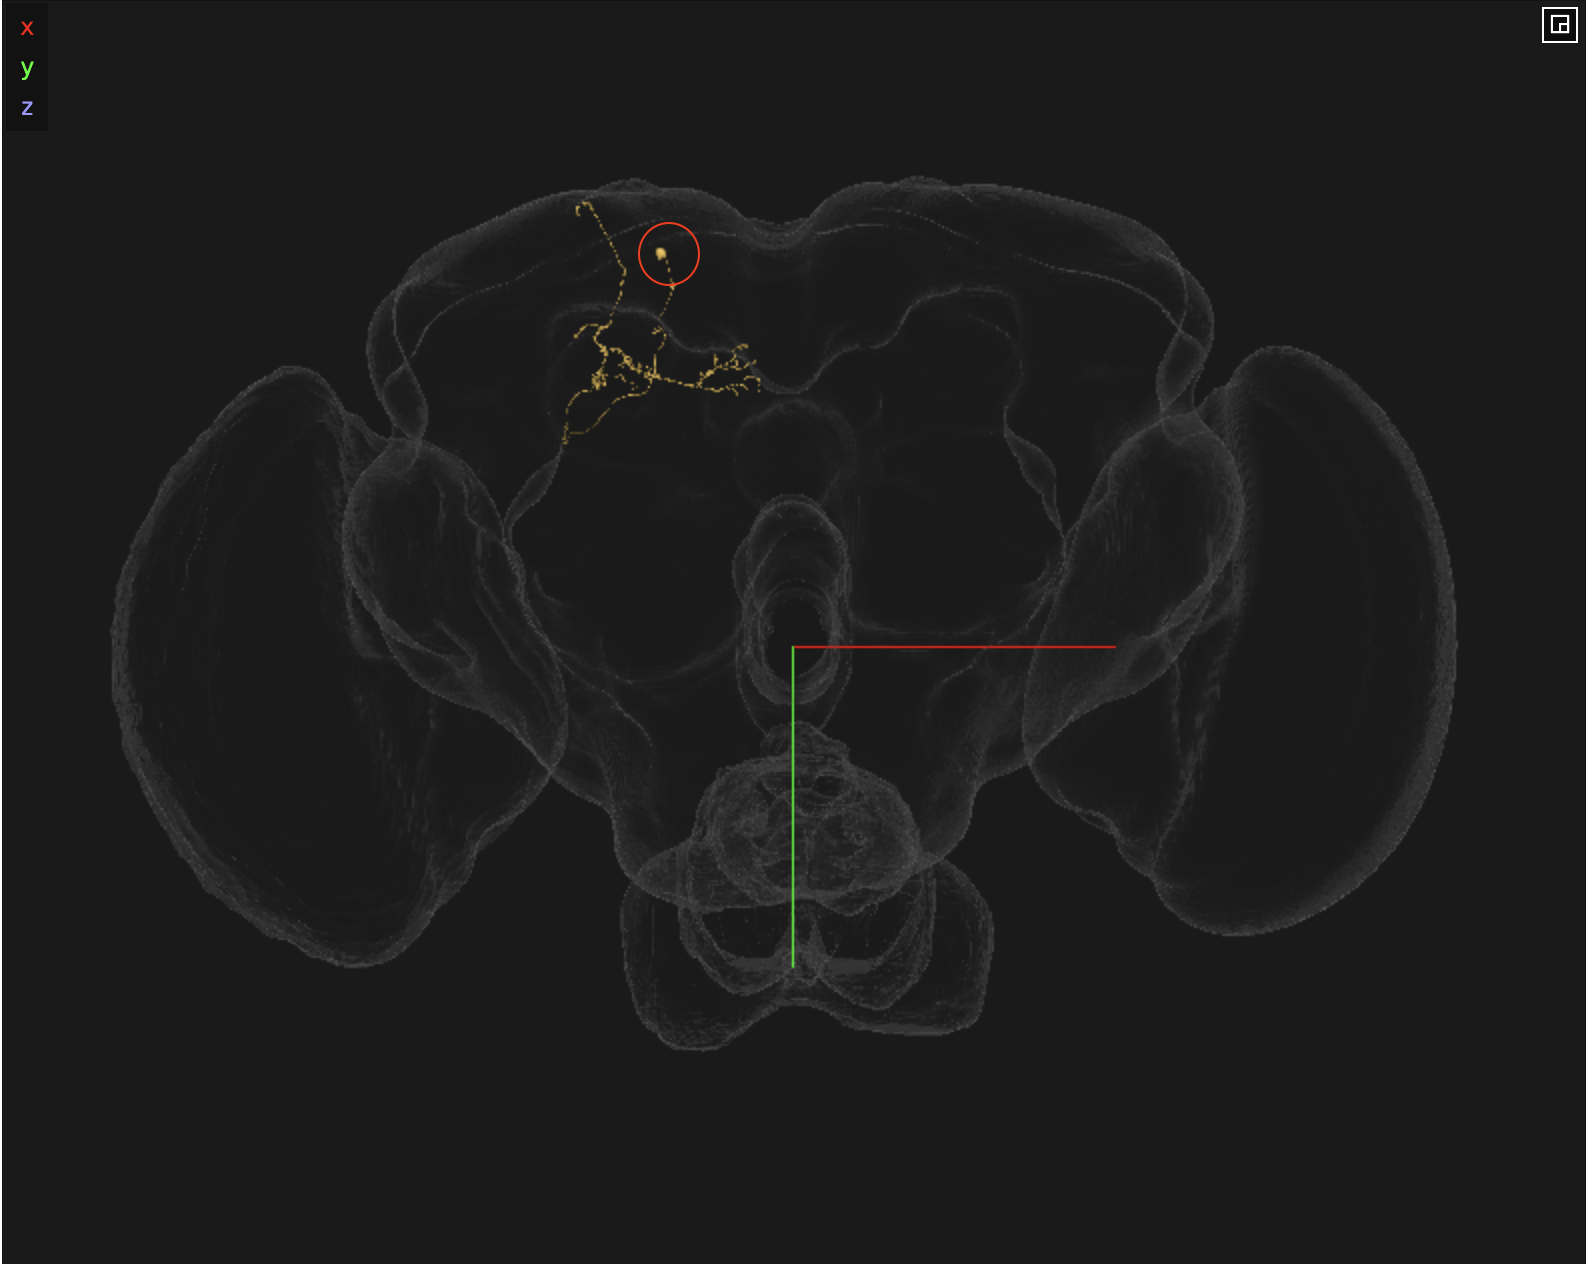
KCa’b’-ap1_R. The cell body is circled in red, indicating that it is on the right side.
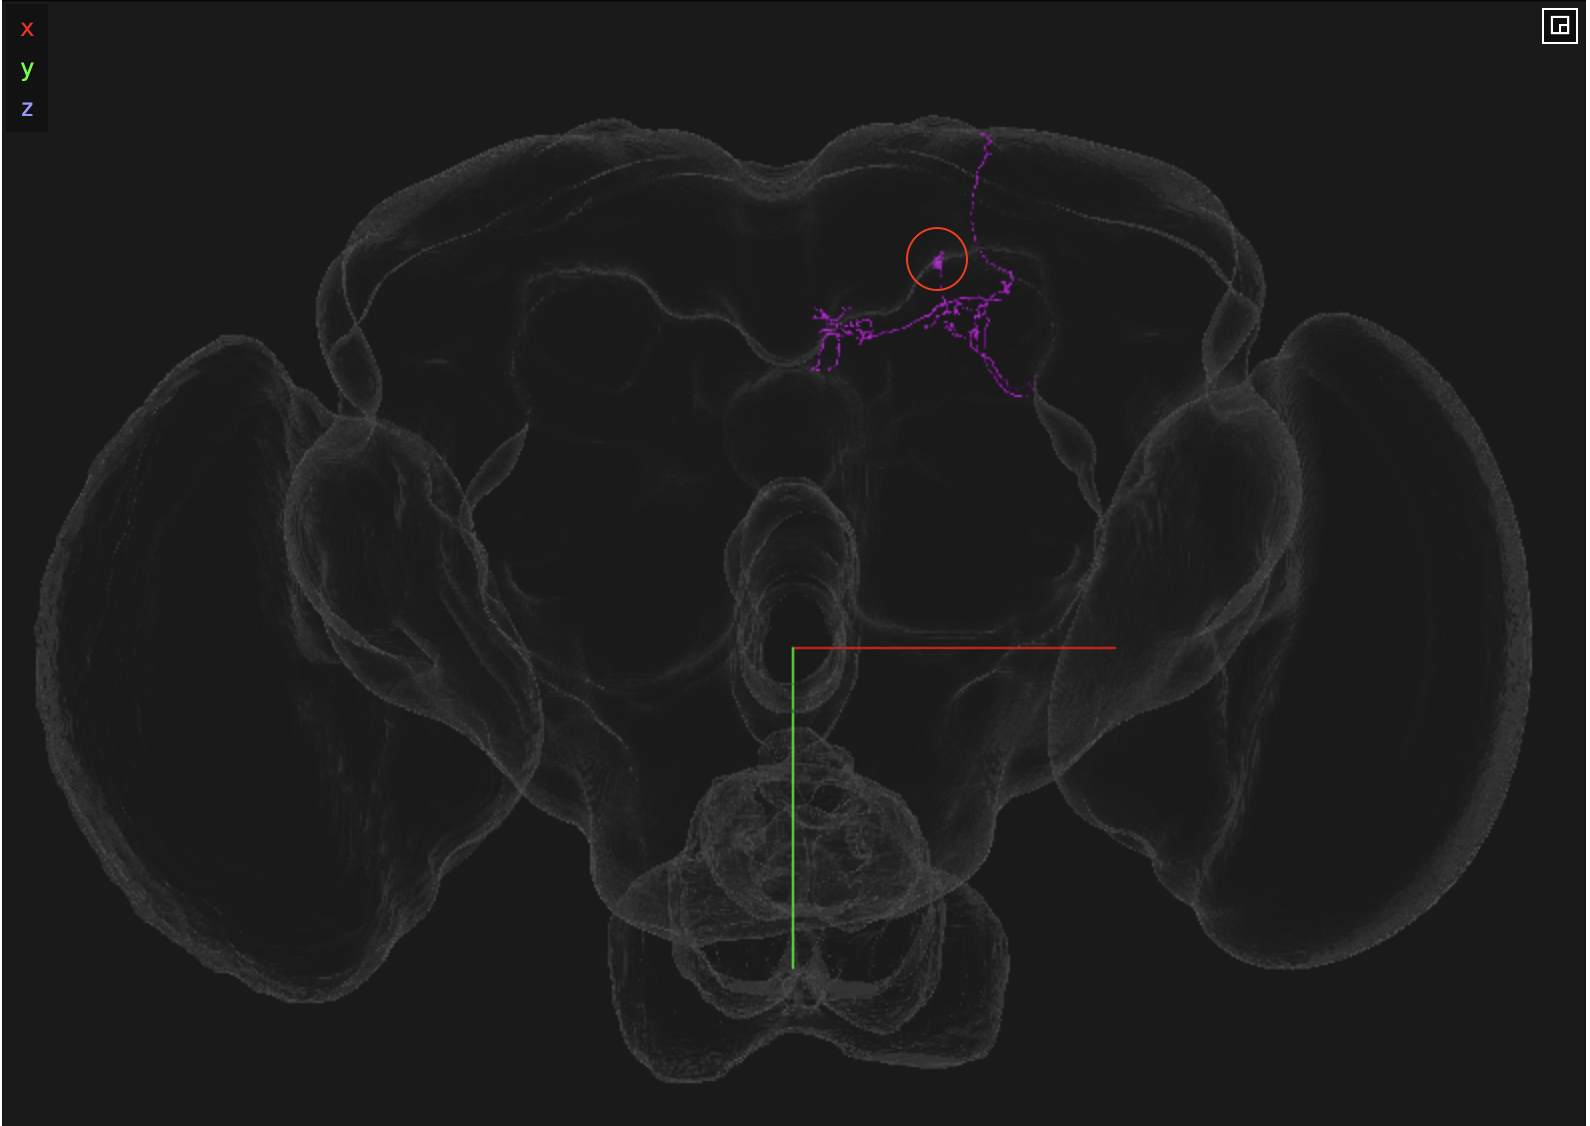
KCa’b’-ap1_L. The cell body is circled in red, indicating that it is on the left side.
Thus, the type tells us what kind of neuron it is, while the instance provides additional information that distinguishes an individual neuron or group of neurons, such as the side of the brain where its cell body is located.
For our analysis, we are interested in Kenyon cells. Rather than specifying individual bodyIds, we can use the type field to search for Kenyon cell types. Since Kenyon cell types begin with KC, we can use a regular expression to select them.
We will use * which acts as a wildcard, meaning that this criterion will match any celltype beginning with KC. For example, this can match cell types such as KCg, KCab, or other Kenyon cell subtypes whose names begin with KC.
If we look at the Neuron Criteria documentation, we can specify the status and cropped fields to select neurons that have been fully annotated and reconstructed. For our analysis, we will use status="Traced" and cropped=False to exclude cropped neurons.
criteria = NC(type="KC.*", status="Traced", cropped=False)We now have a criterion that we can use in our neuPrint queries to restrict our analysis to Kenyon cells.
Fetching Connections
Let’s return to the neuPrint documentation and look at the Fetch Connections section. Here, we find:
“Find synaptic connection strengths between one set of neurons and another using
fetch_adjacencies().”
“The ‘source’ and/or ‘target’ neurons are selected using
NeuronCriteria. Additional parameters allow you to filter by connection strength or ROI. Two DataFrames are returned, for neuron properties and per-ROI connection strengths.”
Let’s break this down.
Source and Target Neurons
A connection between two neurons can be represented as:
Source neuron → Target neuronThe source neuron is the neuron sending the connection, while the target neuron is the neuron receiving the connection.
For example:
Kenyon cell  →  downstream neuron
   source           target
We can use NeuronCriteria to specify which neurons should be included as the source, target, or both.
Connection Strength
fetch_adjacencies() also allows us to examine the strength of connections.
In neuPrint, connection strength is represented by the number of synapses connecting the source and target neurons.
For example:
Neuron A  ───────→  Neuron B
             12 synapses
This tells us that there are 12 synapses connecting Neuron A to Neuron B.
Regions of Interest (ROIs)
We can also restrict our search to specific regions of interest (ROIs). This is useful when we only want to examine connections within a particular brain region. For example, we could restrict our analysis to the mushroom body (MB).
For this tutorial, however, we will not restrict our query to a specific ROI. Instead, we are interested in the overall connections between Kenyon cells and their partners.
What does fetch_adjacencies() return?
When we run fetch_adjacencies(), it returns two DataFrames:
A DataFrame containing neuron properties.
A DataFrame containing connection strengths for each ROI.
We can use these DataFrames to identify the neurons or cell types connected to our Kenyon cells and examine the strength of those connections.
# this is the formula for what you will put in:
# dataframe_1 , dataframe_2 = fetch_adjacencies(upstream_neuron_to_consider, downstream_neuron_to_considera)

# Fetch all input connections to KC neurons (or, neurons pre-synaptic / downstream to KCs)
input_neuron_df, input_conn_df = fetch_adjacencies(None, criteria)

# Fetch all output connections from KC neurons (or, neurons post-synaptic / downstream to KCs)
output_neuron_df, output_conn_df = fetch_adjacencies(criteria, None)input_neuron_dfinput_conn_dfIn input_neuron_df, you can see the bodyId, type, and instance columns of the neurons that send input to Kenyon cells.
As an exercise, try following the next steps with the output DataFrame. This will help you make sure you understand the workflow, since the examples above focused specifically on the input connections. Remember to think carefully about the direction of the connection:
Input to Kenyon cells:

Source neuron  →  Kenyon cell
   pre              post
For the output connections, the direction is reversed:
Output from Kenyon cells:

Kenyon cell  →  Target neuron
    pre            post
In input_conn_df, you can see several important columns in our connection DataFrame:
bodyId_preindicates the neuron ID of the pre-synaptic neuron.bodyId_postindicates the neuron ID of the post-synaptic neuron.roiindicates the brain region (ROI) in which the synapses are located.weightindicates the number of synapses between thebodyId_preandbodyId_postneurons.
However, we are not done yet. Remember our original goal:
Which neurons send information into the mushroom body?
Which neurons receive information from the mushroom body?
Our connection DataFrame tells us which neurons are connected, but it does not yet tell us the cell type identity of those neurons.
We still need to determine the cell types of the neurons connecting to our Kenyon cells, both for the neurons providing input to the KCs and the neurons receiving output from the KCs.
Merge DataFrames
To add this cell type information to our connection DataFrame, we can merge our neuron properties with our connection data.
First, import the following function:
from neuprint import merge_neuron_propertiesWe now have two types of information:
input_neuron_dftells us what cell type each neuron belongs to.input_conn_dftells us which neurons are connected to one another.
More specifically, input_neuron_df contains information linking each
bodyId to its corresponding type and instance.
input_conn_df, on the other hand, contains the connections between neurons.
It tells us the bodyId of the presynaptic neuron (bodyId_pre) and the
bodyId of the postsynaptic neuron (bodyId_post).
We therefore want to combine the information to reveal the cell type indentity of the bodyId_pre and bodyId_post
This is where merge_neuron_properties() is useful.
This takes a neuron DataFrame and a connection DataFrame and adds the requested neuron properties to the connection table.
input_conn_df = merge_neuron_properties(input_neuron_df, input_conn_df, ['type', 'instance'])
input_conn_dfHere:
input_neuron_df provides the information about each bodyId.
input_conn_df provides the connections between bodyId_pre and bodyId_post.
properties=[‘type’, ‘instance’] tells neuPrint which neuron properties we want to add to the connection table.
The function performs the necessary merges and adds _pre and _post versions of each property.
So now, for each bodyId_pre and bodyId_post, we have the corresponding instance and type associated with that neuron.
Before continuing, let’s perform a quick sanity check to make sure our query worked as intended.
Because we used Kenyon cells as our target criteria, we expect the post-synaptic neurons in our input DataFrame to be Kenyon cells.
We can check the type_post and instance_post column to confirm this. Here, we are selecting the type_post column because we queried connections into Kenyon cells.
Therefore, the Kenyon cells should be the post-synaptic neurons, while the neurons making those input connections are the pre-synaptic neurons.
The .unique() method is a pandas method that returns the unique values found in a column.
input_conn_df['type_post'].unique()<ArrowStringArray>
[ 'KCg-m', 'KCg-s1', 'KCa'b'-ap2', 'KCg-d', 'KCa'b'-ap1',
'KCg-s4', 'KCab-s', 'KCab-c', 'KCab-m', 'KC',
'KCa'b'-m', 'KCab-p', 'KCg-s3', 'KCg-s2', 'KCg']
Length: 15, dtype: strinput_conn_df['instance_post'].unique()<ArrowStringArray>
[ 'KCg-m_R', 'KCg-m_L', 'KCg-s1_R', 'KCa'b'-ap2_R',
'KCg-d_R', 'KCa'b'-ap1_R', 'KCg-s4_R', 'KCab-s_R',
'KCab-c_R', 'KCab-m_R', 'KC_R', 'KCg-d_L',
'KCa'b'-ap2_L', 'KCab-s_L', 'KCa'b'-ap1_L', 'KCa'b'-m_L',
'KCab-m_L', 'KCab-c_L', 'KCab-p_L', 'KCab-p_R',
'KCa'b'-m_R', 'KCg-s1_L', 'KCg-s3_L', 'KCg-s2_R',
'KCg-s3_R', 'KCg-s2_L', 'KCg-s4_L', 'KC_L_fragment',
'KCg_L']
Length: 29, dtype: strWe notice that some fragment neurons are still present in the instance_post columns. We can use this information to clean our DataFrame and remove these neurons from our analysis. We can also do the same for the instance_pre column.
We also notice that there are several missing values (NaN). Let’s remove any rows where at least one column contains a NaN. This leaves us with connections where both the pre- and post-synaptic neurons are not labeled as fragments and all required columns contain values.
input_conn_df = input_conn_df[~input_conn_df["instance_post"].str.endswith("fragment", na=False)]
input_conn_df = input_conn_df[~input_conn_df["instance_pre"].str.endswith("fragment", na=False)]
input_conn_df = input_conn_df.dropna()input_conn_df# Save the results to a dedicated project folder.
# Update this path to the folder where you are storing your tutorial files.
project_dir = 'ENTER PROJECT DIRECORY HERE'
# eg: project_dir = '/Users/AV/Desktop/MB/'
input_conn_df.to_csv(project_dir + "input_to_KC.csv", index=False)